Jo useampana jouluna on tullut tehtyä kuusiaiheinen tyyny ja niinpä tänäkin jouluna tein sellaisen. Tänä vuonna uutena värinä siihen tuli ripaus pinkkiä. Koska instagramin puolella tuli kyselyä kuinka tuo keskusta tehdään, niin tässä alla siihen muutama kuva. Todella yksinkertainenhan se on.
Tähän "Holiday Spruce" #holidayspruce tyynyyn tarvitset vain haluamasi värisiä kaitaleita kuusiosaan ja jäännöspalathan sopii tähän erinomaisesti. Taustaan ja reunuksiin mieleisen väristä kangasta riippuen kuusen ja tyynyn koosta.
Now for several previous Christmases I have made a Christmas tree pillow so this year I made one too. I added a new color this year, a hint of pink. Some people on Instagram asked how the tree is made so I decided to make a little tutorial. The tree is really simple to make.
For the "Holiday Spruce" #holidayspruce you need strips for the tree part and scraps are very good for this project. The background fabric requirements depend on how big your tree and pillow are.
Tässä toisessa kuvassa on viime vuotinen tyyny kaverina. Ne sopivat yhteen väreiltään sekä tyyliltään ja laitoin tähänkin nuo huopapompulat kulmiin. Ohje viime vuotiseen #festivespruce paper piecing kuuseen löytyy sivupalkista "free patterns" ja kaksi vuotta aikaisempaan #evergreentreequilt ohje löytyy sivupalkin Etsy kaupasta.
In this other picture you can see my last year pillow as well. These two make a nice couple together. I added felted green poms to the corners so they match even more. The pattern for the last years #festivespruce pillow you find on the side bar under free patterns and for the #evergreentreequilt pillow two years ago in my Etsy shop.
1. Piirrä paperille kolmio, sen pituinen ja paksuinen kuin haluat kuusen olevan. Käytin tässä ns. lihakääreen vahvuista paperia mutta esim. kopiopaperikin on ok. Piirrä viiva keskelle alhaalta ylös.
Nro 1 viivat ovat apuviivoja, kun ompelen ensimmäiset kaitaleet. Haluan että kaitaleet kulkevat suurin piirtein samaan suuntaan molemmissa puoliskoissa.
Nro. 2 on merkki latvaa varten. Se ei ole ollenkaan tarpeellinen mutta itse halusin että viimeiset palat alkavat jokseenkin samasta kohtaa, niin merkkasin sen.
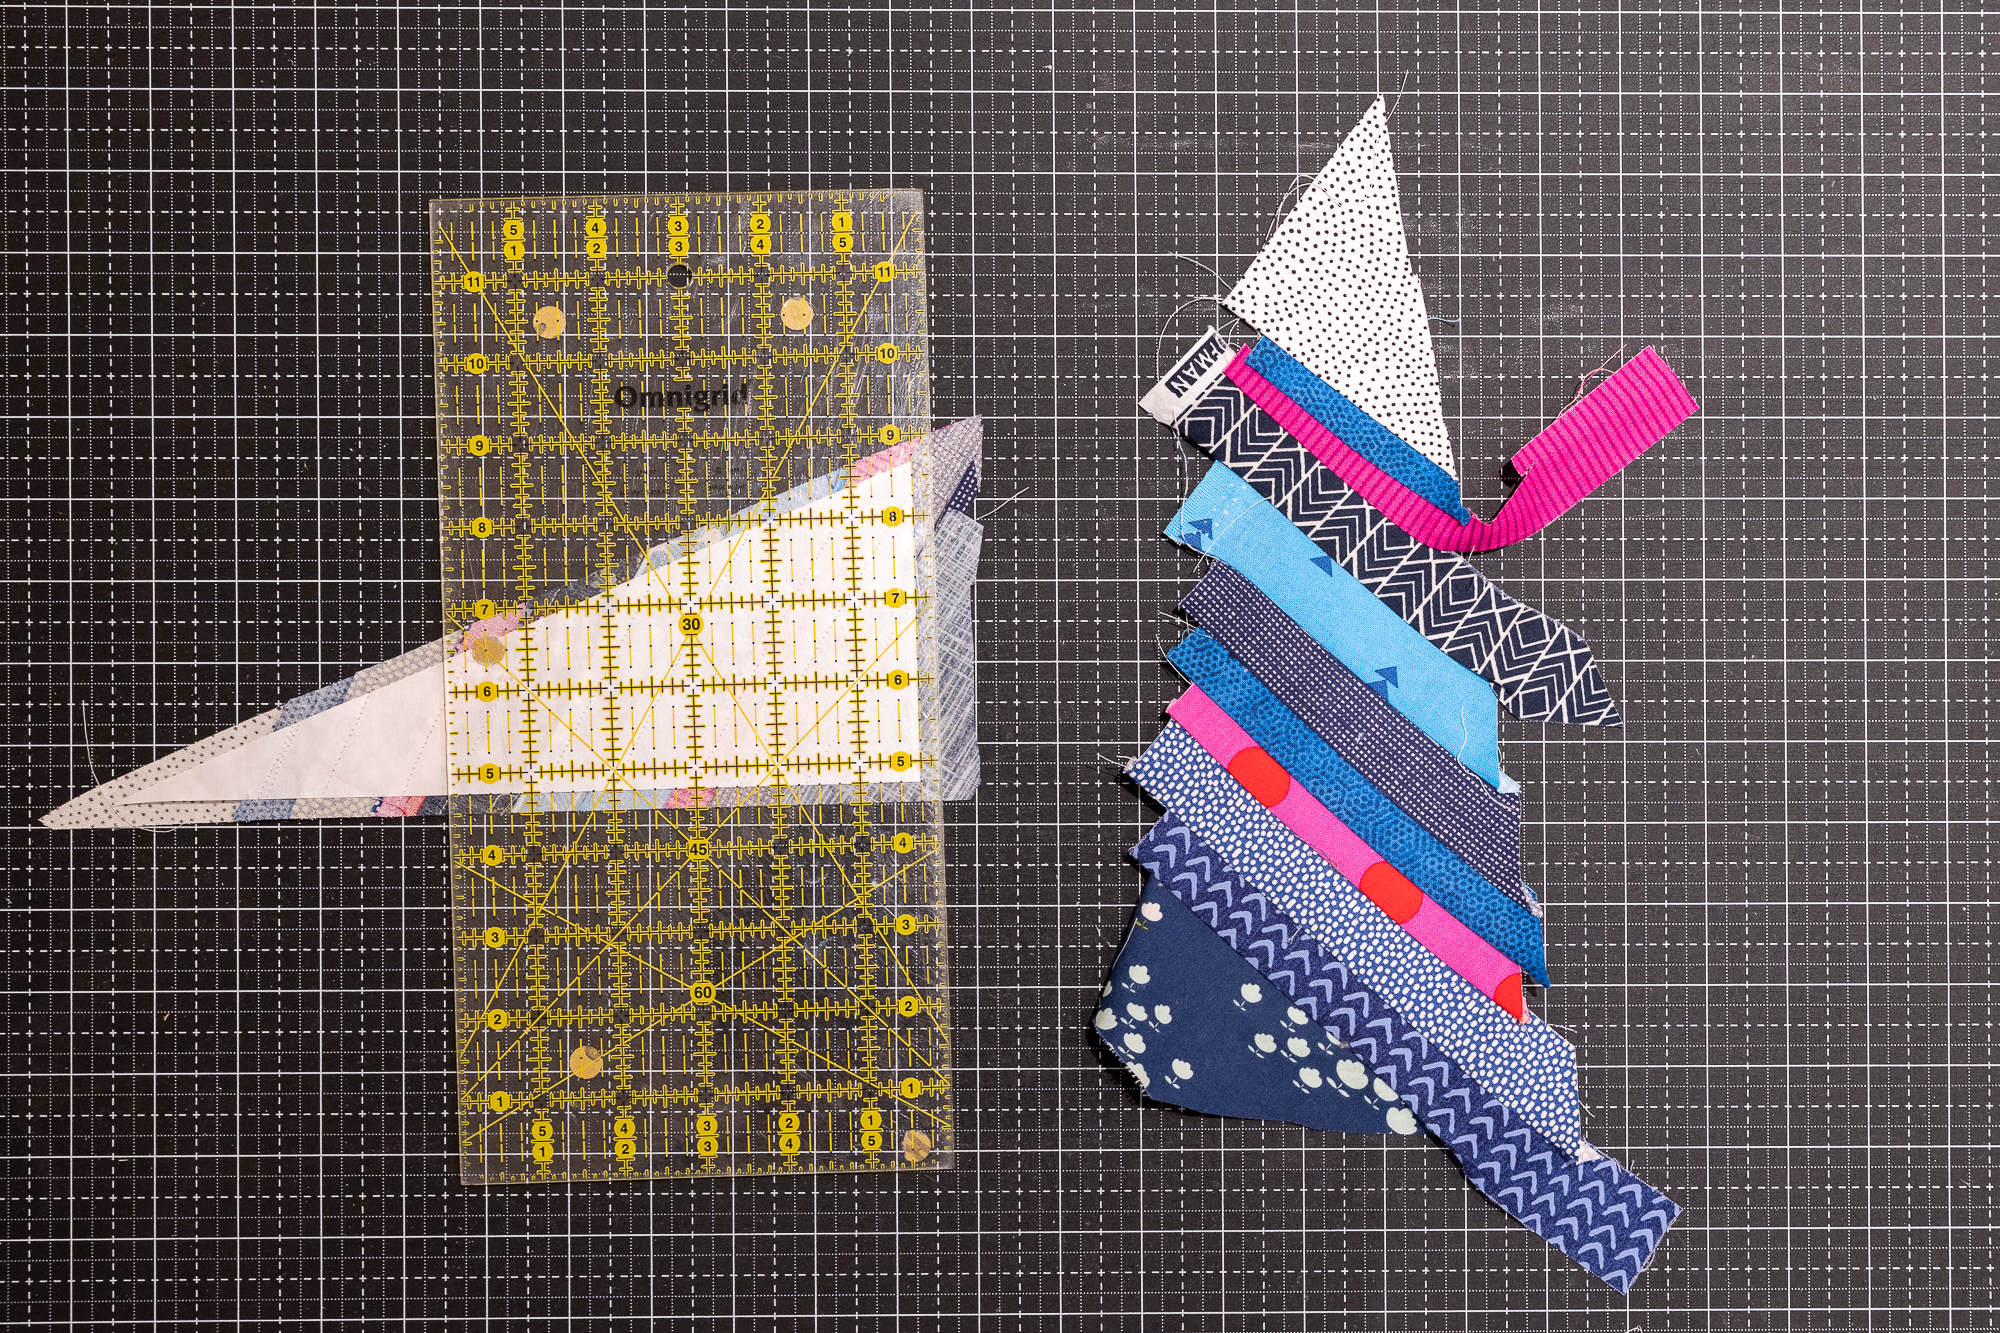
1. Draw a triangle the size you want the tree to be on a paper. I used paper which was as thick as freezer paper but copy paper works as well. Draw a straight line through the triangle.
No. 1 lines are just guidelines to sew first strips. Both strips are supposed to run roughly in the same direction in both halves.
No. 2 is mark for the last pieces. It's not necessary but I want the last pieces start from the same point.
2. Cut out the pieces.
3. Cut strips of different widths. My strips for this small tree were 1"- 1 1/2" wide.
Käytän tilkkutyöjalkaa, josta tulee 1/4 tuuman saumanvara.
4. Start by sewing two strips together with their right sides facing each other and make sure that the guideline runs along the strip. The strips need to be long enough to cover both edges of the paper. It should be exceeded by at least 1/2". Use stitch length 2 so the paper is easier to tear off. I recommend to use 1/4" quilting presser foot.
5. Open the strips and press with the fingernail or iron.
6. Lisää seuraava kaitale ja ompele. Ompele molemmat puolikkaat tällä tavoin valmiiksi.
6. Add the next strip and sew. Sew both halves this way.
7. Silitä palaset hyvin. Leikkaa 1/4 tuuman saumanvara ympäriinsä. 7. Iron both halves well. Cut 1/4" seam allowance on each side using the paper as a guide.
8. Sew the pieces together in the middle and iron.
9. If you want, you can add strips around the tree. Mine are 1" wide and I cut them significantly longer to have enough fabric to trim it even.
10. Lisää tausta. Tässä vaiheessa revin paperit varovasti pois. Lisään vielä reunakaitaleet ympärille, niin kuusi ei tule ihan kiinni reunakanttiin ja on vähän ilmavampi.
10. Add the background. Now you can carefully tear off the papers. I'll add borders around it so the tree is little more airy and it doesn't touch the binging.
This year's pillow was fun and fast to make :)


